
 Adding a car amplifier can totally transform a basic stereo into a sound system that packs some real punch. Getting extra clarity, power, and bass out of your music is a lot easier than you might think, even if you don’t have pro level wiring skills. I’ve done a few amp installs over the years, and I’ll walk you through the whole process in simple steps so you can avoid the confusion and sketchy wiring jobs I ran into when I was learning.
Whether you’re planning to upgrade your bass with a subwoofer amp or give a boost to the power for your door speakers, this guide breaks it all down. You’ll find helpful tips for planning your install, connecting everything the right way, and making sure your audio sounds clean with no nasty surprises. Let’s get started!
Step 1: Plan Your Car Amplifier Setup
Before grabbing any tools, it helps to map out what you want to accomplish with your amp upgrade. A little prep now can save you a lot of hassle later on, especially if it’s your first project of this kind.
Things to Consider:
- Are you powering a subwoofer, aftermarket speakers, or both?
- Where can you safely mount the amplifier (trunk, under a seat, on the back of a seat)?
- Does your stereo (the head unit) have RCA outputs, or will you need a line output converter?
- How much amp power do you really need for your speakers?
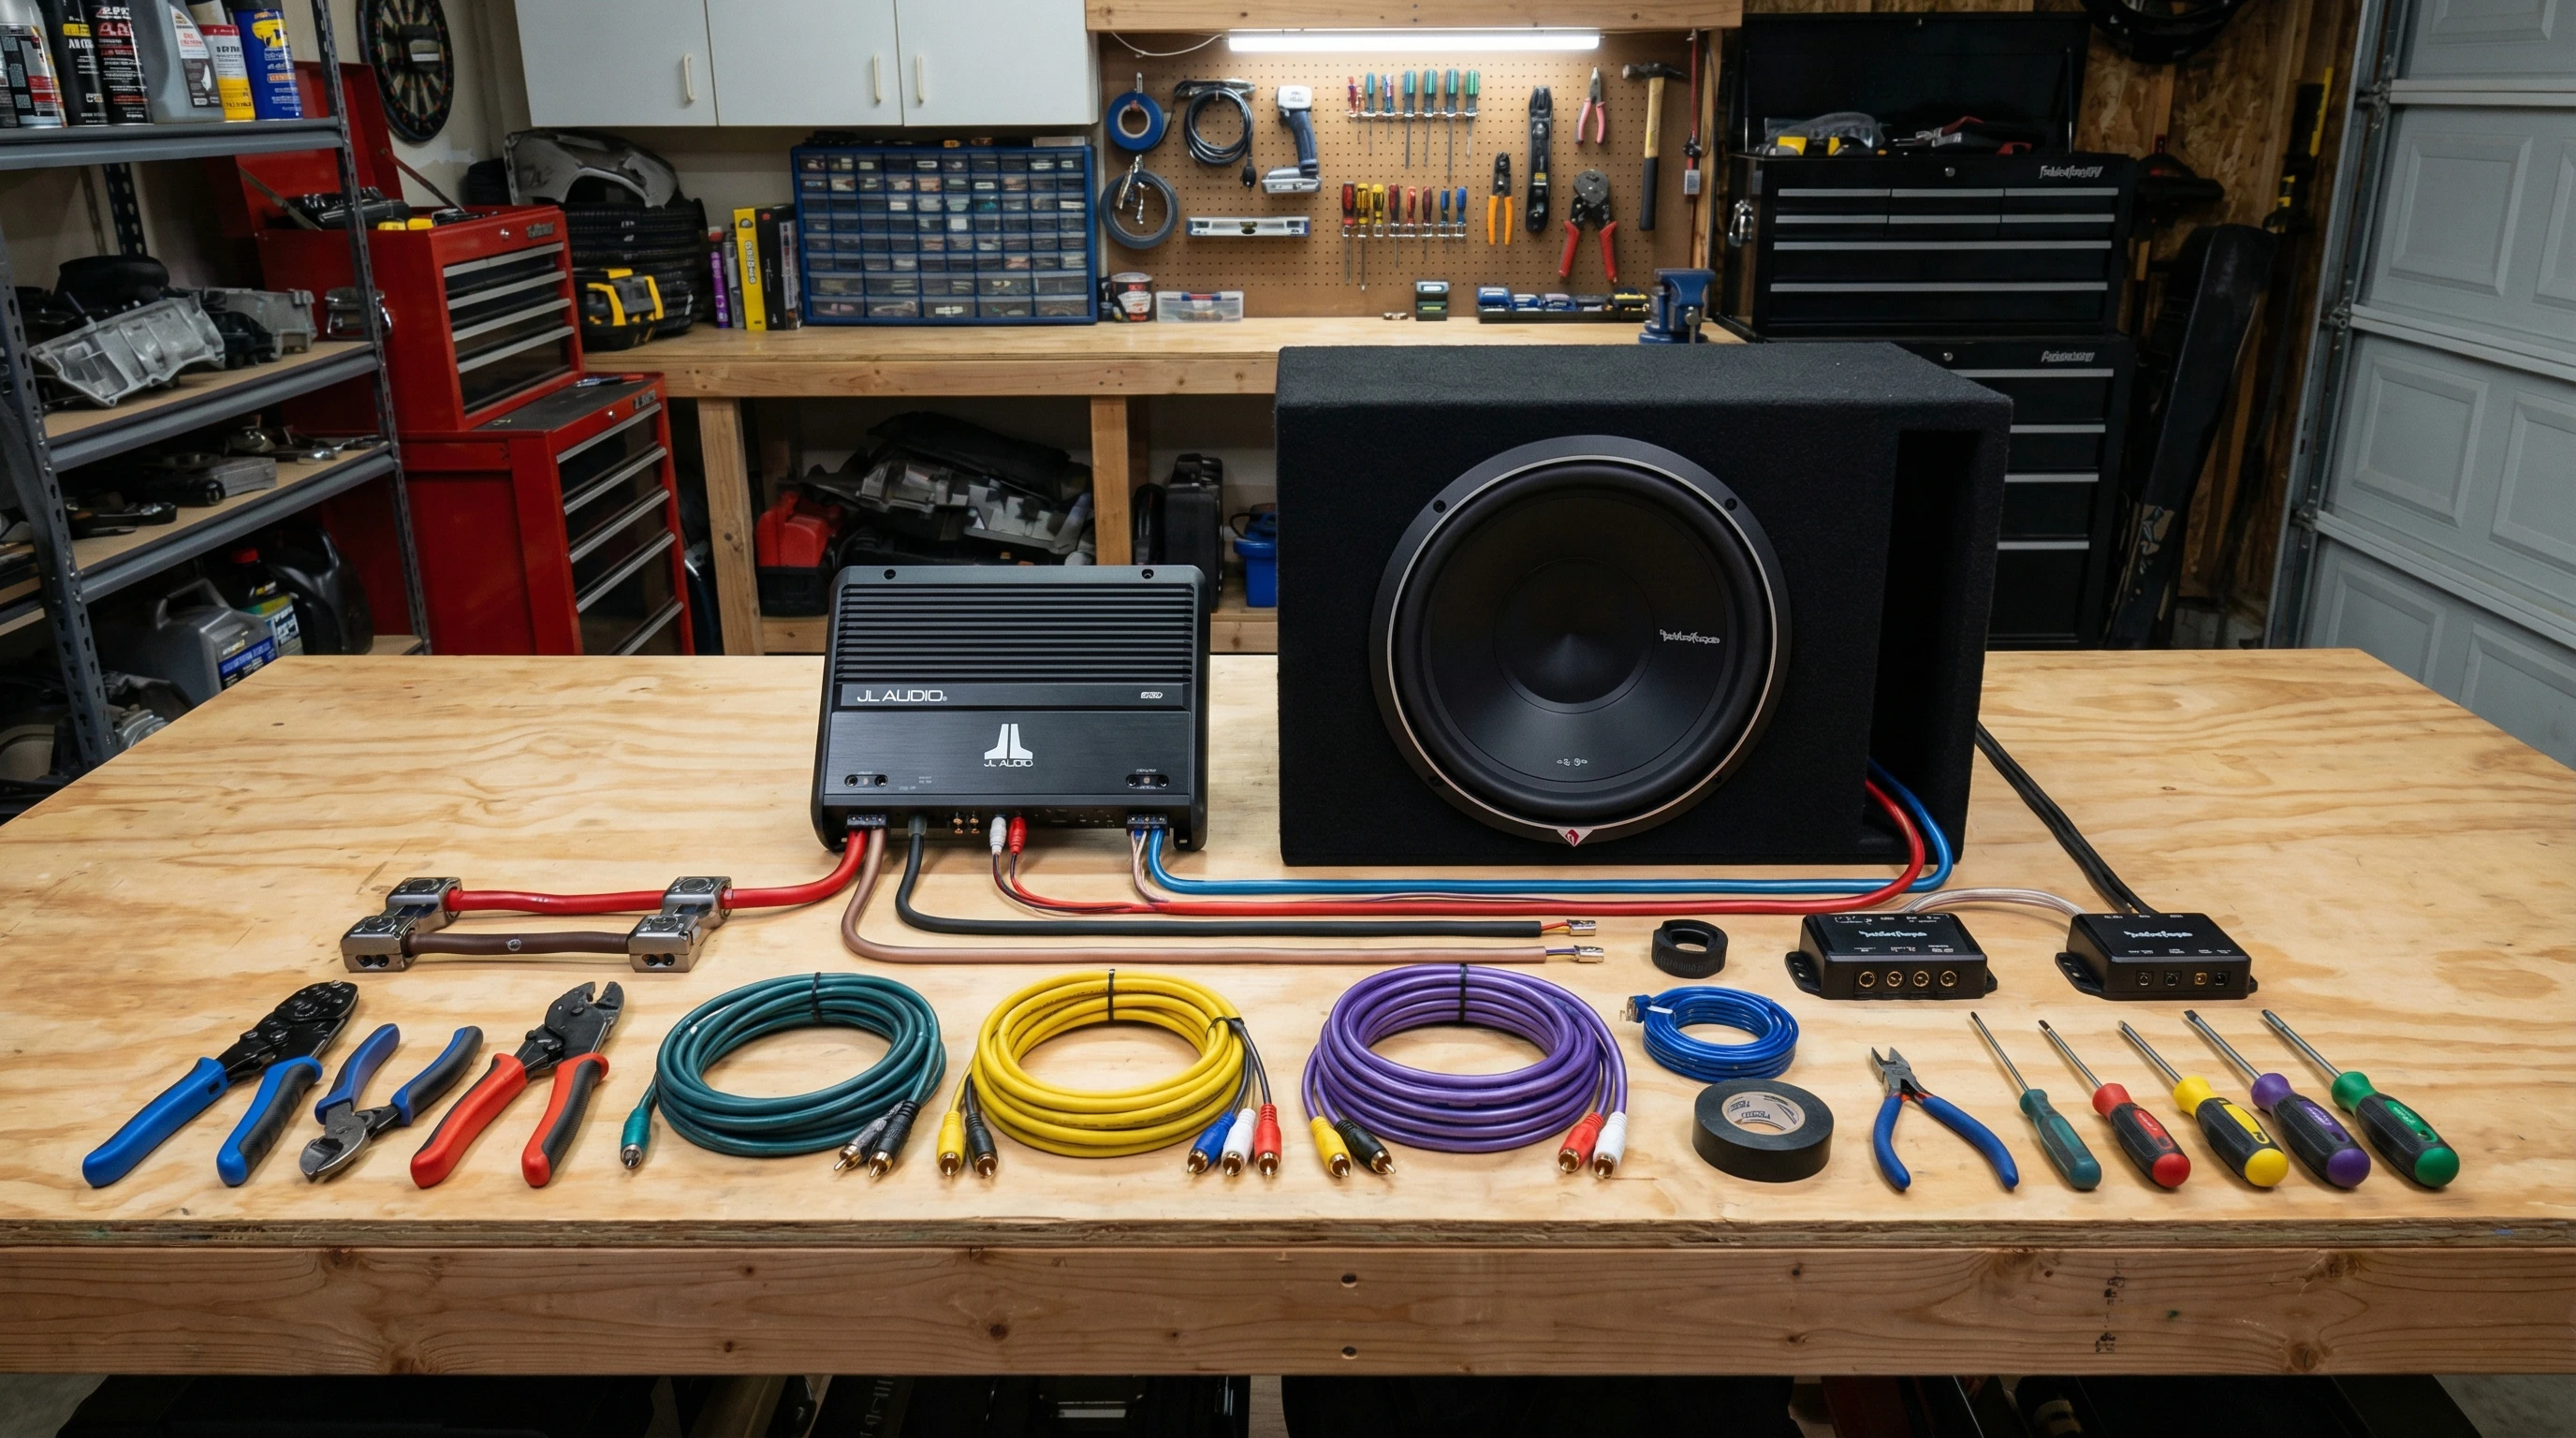
Gear You’ll Need:
- Amplifier kit (usually includes power wire, ground wire, fuse holder, RCA cables)
- Screwdrivers, sockets, and possibly a panel tool
- Utility knife or wire cutters
- Crimp connectors or ring terminals
- Your new amplifier
I always check my amplifier’s manual before starting. Some amps have particular wiring or mounting instructions you’ll want to follow. When you dig into the manual, you often stumble upon tips tailored for your specific model, which helps you avoid mistakes and potential future headaches.
Step 2: Disconnect the Battery for Safety
This step is crucial if you want to avoid sparks or damaging your car’s electronics. Before touching any wires, disconnect the negative terminal from your car battery. I learned this the hard way after some sparks nearly ruined my day. Don’t skip this part; always put safety first.
Step 3: Run the Power Wire from Battery to Amplifier
The main power cable brings juice from your battery to the amp. Most amp kits provide an 8 gauge or 4 gauge wire; use what’s recommended for your amp’s power draw.
- Route the wire from the battery, through the firewall, and under plastic trim panels toward the amp’s mounting spot. Take your time to neatly tuck wires along the way for both safety and aesthetics.
- Install the fuse holder within 18 inches of the battery. Don’t connect to the battery just yet, but mount the holder securely so it doesn’t shift around while you drive.
- Hide wires under carpet or trim for a clean look and to avoid tripping hazards. A panel removal tool comes in pretty handy here and helps smooth the way for routing cables.
It can get a bit tricky figuring out where to poke through the firewall. Some cars have premade grommets you can poke through, but others might take some creative thinking. Never run wires near hot engine parts, as this can cause serious problems down the road. If you don’t see an obvious entry point, check your vehicle’s manual or get into some car audio forums for advice tailored to your particular make and model.
Step 4: Mount the Amplifier
Pick a spot with good airflow (amps get hot) and enough space for wiring. I’ve had decent luck with trunk side panels, under the rear seat, or behind back seats in SUVs. Use the screws provided, or self tapping screws, but always check what’s behind where you’re drilling to avoid fuel lines or wires. You can also use a rubber mat to help dampen vibrations and noise, giving your installation a touch of professionalism and peace of mind.
Step 5: Make the Audio Connections
Connecting RCA and Remote Turn On Wires
- If your stereo has RCA outputs, plug those into your amp. Run the RCA cables down one side of the car (opposite side of power wires) to avoid interference.
- The remote wire tells your amp when the stereo is on. This is usually a thin blue wire; connect one end behind your stereo to its remote output (or to the power antenna wire in some cases), and the other end to your amp’s remote input.
Hooking Up Speaker Wires
If you’re powering regular speakers, run new speaker wires from the amp output terminals to the speakers, usually through door jams or along the trim. Factory wiring can be used sometimes, but new wires are a safer bet for maximum sound quality and long term reliability.
If you’re wiring a subwoofer, use nice fat speaker cable, usually 12 or 14 gauge, for clean bass and minimal signal loss. It’s a small detail that makes a big difference, especially for deep, punchy sound.
Step 6: Ground the Amplifier Properly
A solid ground connection is essential for clean sound and great amp performance. Strip the end of your ground wire and crimp on a ring terminal. Attach it tightly to a bare metal part of the car’s chassis (not painted). Scuffing the paint away with sandpaper or a file helps ensure good conductivity. Keep the ground wire as short as possible, ideally under 18 inches, for best results.
Step 7: Make the Final Power Connection
- Double check your wiring: power, ground, remote, RCA, and speaker wires all firmly connected and secured.
- Double check the fuse is properly installed in the fuse holder.
- Reconnect your car’s battery securely to restore power to your electrical system.
- Connect the power wire to the battery terminal, ensuring all connections are tight and corrosion free.
If you have a voltmeter, give the circuit a quick test to make sure everything’s getting power before closing it all up. This step adds an extra layer of confidence before you button up your work.
Step 8: Test Your System & Tuning
- Turn on your car stereo and slowly raise the volume. Make sure the amp powers up (often a light will come on to indicate power).
- If you hear buzzing or engine noise, double check grounds and cable routing. Make sure your power and RCA wires are run separately, since crossing them can cause interference.
- Set your amp gain by playing music at normal listening volume, then slowly turning the gain knob up until you start to hear distortion, then back it off a little. Each amp is a bit different, so go by ear and don’t crank it up all the way.
I like starting with all the bass and treble settings on the head unit set flat, then dialing in the amp’s filters and crossovers to taste. This takes a bit of patience but really pays off in sound quality once you lock in your settings. Experiment with adjustments to tailor the sound to your personal taste and your car’s acoustics.
Common Issues & Quick Fixes
No Sound from Speakers or Sub?
- Check fuses, all wiring, and make sure the remote wire is sending 12V when the radio is on. Sometimes missing a simple detail like this is all it takes to fix the problem.
- Confirm RCA cables are firmly plugged in both ways.
- Check amp’s onboard fuses (some have spares built right in for convenience).
Hearing a Whining Noise?
- This usually means a ground issue. Reseat your ground wire, and try moving wires away from power cables to stop interference.
Amp Cutting Out at High Volumes?
- Your amp might be overheating or drawing more power than your wiring supports. Check your ground connection, consider upgrading to heavier gauge wires, or check your alternator and battery for performance issues.
Tips for a Clean, Professional Install
- Bunch up excess wire with zip ties to avoid rattles and stray cables.
- Label your wires (especially speaker leads) for easier troubleshooting later on.
- Double check tightness on all screws; loose wires can cause plenty of trouble, including random drops in sound or strange noises.
- Tuck all cables under trim or carpet for a tidy look and safe driving. A professional appearance also means less distractions and easier maintenance if you ever need to debug an issue.
Wrap-Up & Next Steps
Adding a car amplifier is totally doable for DIYers with basic tools, a little patience, and a willingness to follow instructions. Once you enjoy the way your favorite tracks sound with some real muscle behind them, all that time spent routing wires and tightening ground screws will feel worth it.
Quick Checklist:
- Pick an amp and location that fits your goals and car layout.
- Use proper wiring and take time with cable routing for best results.
- Ground everything properly to avoid unwanted noise that can spoil your listening experience.
- Test before finishing up so you can troubleshoot easily and save yourself unnecessary stress later on.
If you’re ever stuck, amp forums and YouTube are packed with tips from others who have been there. Getting your car audio dialed in is pretty satisfying, and you’ll learn something new with every install. Ready to enjoy some real audio power? Drop your questions or amp install stories below. I always like hearing how other DIYers tackled their setups. Don’t forget to take your time, trust your instincts, and above all, have fun as you make your ride sound next level cool!