
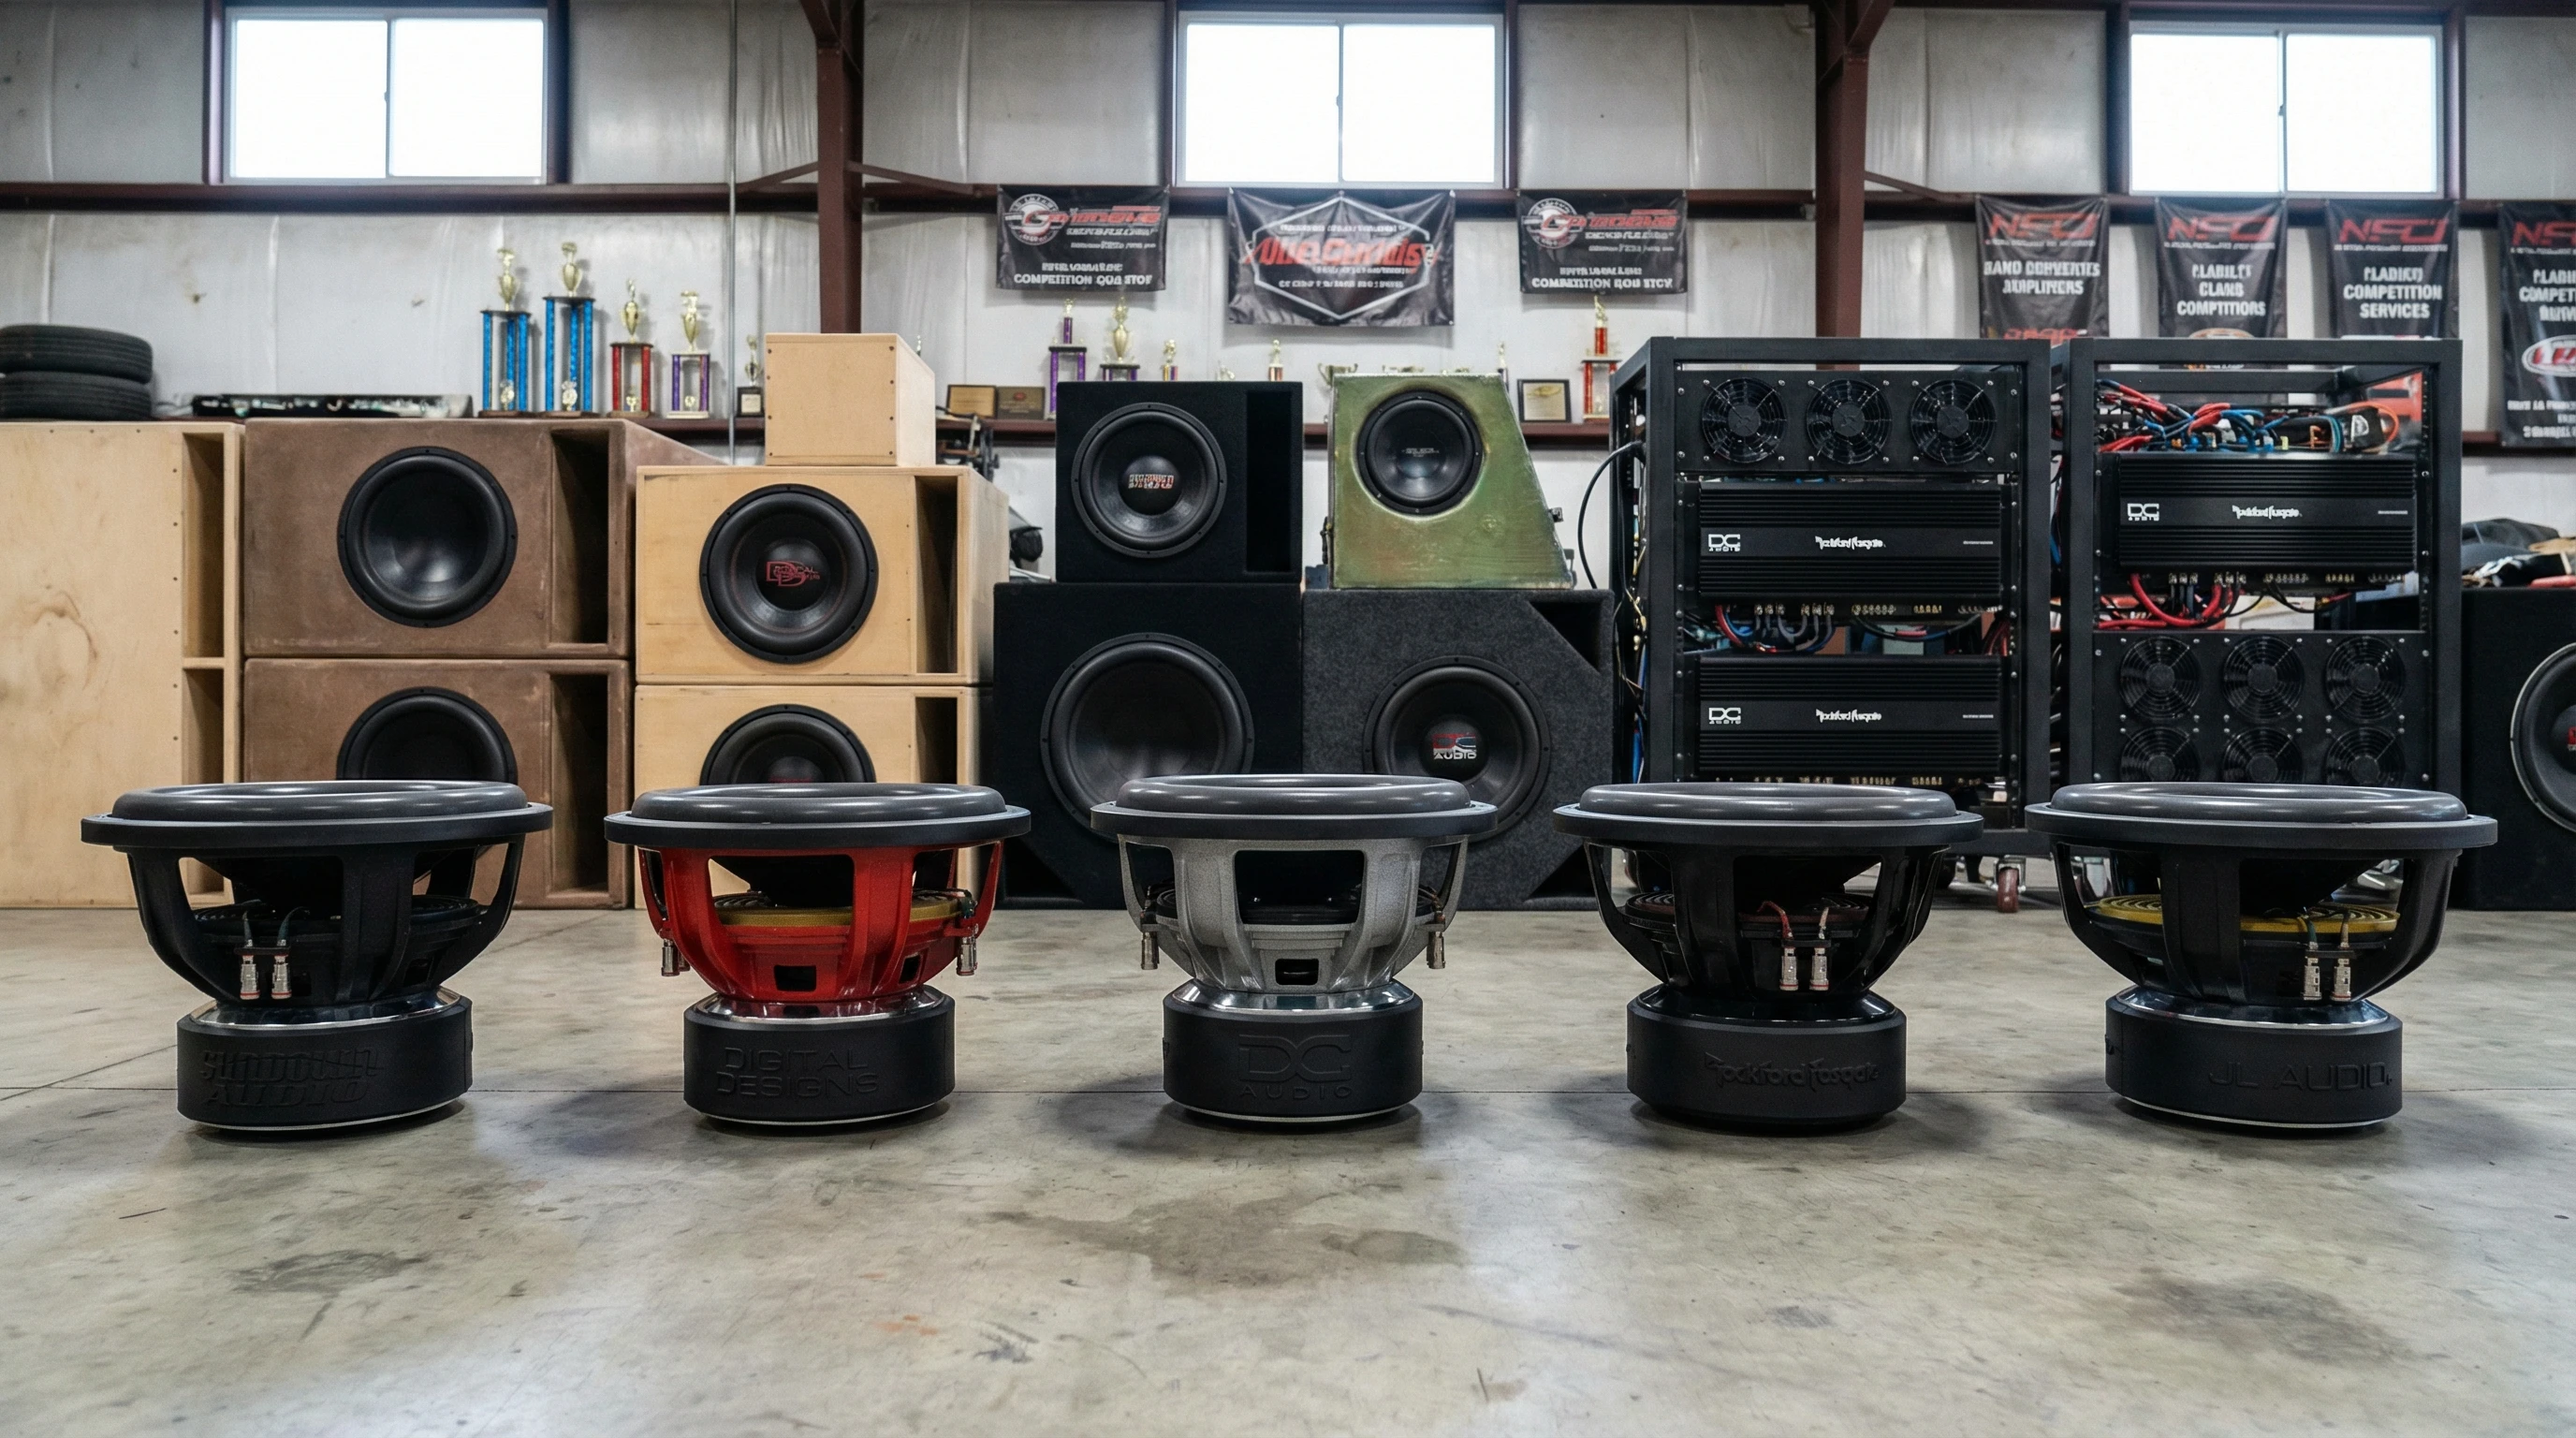
If you’re looking for serious bass, competition-grade subwoofers are the way to go. The world of 12-inch car subwoofers is packed with options, but narrowing down what actually delivers that deep, tight punch can feel overwhelming. I’ve spent a lot of time testing, demoing, and talking to audio heads in the car audio community, and I want to share my first-hand experience to help you find the right competition 12 for the road, the show, or just your daily commute.
Here’s a quick look at my current top five picks for 2026. Then, I’ll break everything down in greater detail so you’ll know exactly what makes these subs stand out from the crowd.
Z-Series ZV7 12″ Subwoofer
Brand Website: DCSoundLab.com
Price: $649 – $699 USD
RMS Power: 2000W
Sensitivity: 86dB
Enclosure Type: Sealed/Ported
Warranty: 1 Year
Consumer Rating: 4.8/5
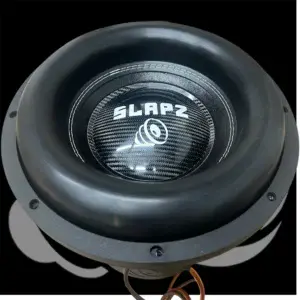
Slapz Audio Smackdown V2 12″ Subwoofer
Brand Website: SlapzAudio.com
Price: $589 USD
RMS Power: 2500W
Sensitivity: 85.5dB
Enclosure Type: Ported
Warranty: 2 Years
Consumer Rating: 4.7/5
Fi Audio HC Series 12″ Subwoofer
Brand Website: FiCarAudio.com
Price: $579 – $709 USD (depending on customizations)
RMS Power: 1500W
Sensitivity: 87dB
Enclosure Type: Sealed/Ported
Warranty: 1 Year
Consumer Rating: 4.9/5
Gately Alpha 12″ V2 Subwoofer
Brand Website: GatelyAudio.com
Price: $699 USD
RMS Power: 2200W
Sensitivity: 86dB
Enclosure Type: Sealed/Ported
Warranty: 1 Year
Consumer Rating: 4.8/5
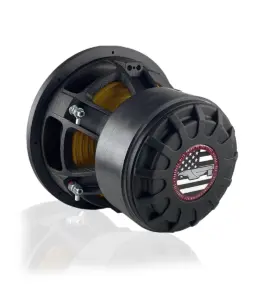
Orion HCCA122
Brand Website: OrionCarAudio.com
Price: $569 – $599 USD
RMS Power: 2000W
Sensitivity: 84.6dB
Enclosure Type: Ported
Warranty: 1 Year
Consumer Rating: 4.5/5
Subwoofers in this category bring their own flavor of bass, but there are some cool features with each that are worth checking out. Here’s what stands out to me about each one, plus some first-hand tips so you can get the best bang for your buck (and your bass!).
Z-Series ZV7 12″ Subwoofer Review
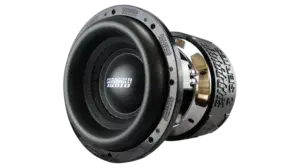
The ZV7 from DC Sound Lab has a reputation with bassheads for a reason. It’s all about raw, reliable power that can take a beating. I had a pair of these running for a whole show season before writing this. No matter what genre I pushed—EDM drops or old-school hip hop—these didn’t cave, overheat, or lose detail.
Build Quality & Materials
Buildwise, the ZV7 uses a heavyduty aluminum basket, oversized magnet, and a fourinch copper voice coil that really helps keep things cool when you’re running them hard. The doublestacked magnets add up to some serious motor force, so you don’t just get bass; you get clean, supercontrolled bass. When you pick one up, you feel the weight is totally justified by the beefy design.
Sound Performance
The ZV7 delivers deep lows without getting muddy. Kick drums hit with a thickness that doesn’t fade as volume goes up. Subtle musical details, like bass guitar slides, cut through the mix just as well as heavy 808s. On a demo run in my friend’s Chevy Tahoe, two ZV7s hit a legit 146.5 dB, enough to rattle rearview mirrors but still sound musical.
Power Handling & Reliability
This sub is made to handle up to 2000W RMS, which means you can pair it with a highoutput amp without constantly babysitting the gain dial. I’ve run pretty aggressive gain settings for extended periods without any burns, shorts, or distortion. DC Sound Lab also includes a 1year warranty, which gives some peace of mind for an investment like this.
Box Options & Installation Tips
The ZV7 plays really well in both ported and sealed boxes, though I generally get bigger, fuller sound with a properly tuned ported enclosure (around 2.2-2.5 cu ft tuned to 33-35Hz). Because of the size and weight, some reinforcement on your sub box helps, especially if you’re planning to compete.
Pros & Cons
- Massive bass output, super punchy
- Built for high power and competition use
- Stays cool under heavy play thanks to smart cooling features
- Need strong electrical system (upgraded alternator helps at this wattage)
- Pretty heavy, so plan box and install accordingly
- Runs at a premium price, but delivers on value
Slapz Audio Smackdown V2 12″ Review
The Smackdown V2 is one of the newer kids on the block but has really made a splash with its aggressive style and even more aggressive performance. I got a chance to try this out at Slamology and was surprised at how clean it performed at ridiculous output levels.
Build Features
Slapz Audio uses a threeinch eightlayer flat wound copper voice coil, massive triplestacked Y35 magnets, and a nonpressed paper cone. The surround is a fat highroll rubber design, so the excursion is wild, with plenty of visible movement. My buddy who runs two of these in a ported box says the thermal handling is even better than most brands at this price point.
Performance & Sound Quality
This sub hits hard in the SPL lanes but still keeps things listenable for daily driving. My test rig measured a pretty clean frequency response from about 24Hz up to 150Hz with no huge drops. It shines in vented enclosures, especially with big port area (I used a dual aero port setup in my box test, which really let it breathe). There’s a satisfying lowend rumble on tracks like Travis Scott’s “Goosebumps,” where you can feel every nuance.
Power Handling
Rated for 2500W RMS, you’ll want a beefy amp to really open these up. They do require a good electrical system to avoid voltage drops, but they’ll reward you if you feed them real power. I never ran into signs of stress, even during long demo sessions hovering around maximum volume for twenty minutes at a time. Given the price, it’s very competitive for the performance range.
Customization & Looks
The Smackdown V2 series lets you choose from a few basket colors if you want to match your build theme. It’s a nice touch if you ever plan to show off the guts of your setup. The overall appearance is eye-catching and adds next-level cool to your trunk or build demo.
Pros & Cons
- High excursion, really flexes on deep notes
- Good SPL with enough balance for daily use
- Easy to install, compact motor for the power
- Needs strong amp and battery support
- Not as musical as some others in super low volume listening
- No sealed box option recommended for this version
Fi Audio HC Series 12″ Subwoofer Review
Fi Audio has always been on my “recommend this to your friends” list for custom car subs. The HC Series gives you a beefy, handbuilt sub with tons of custom options, right down to tinsel lead style and directconnect terminals.
Customizable Options
Fi lets you select options like dual voice coil configuration, SPL spider, hixmax, cooling, and more. I’ve ordered with the SPL coil and extra cooling, which really brings out the best for burpstyle SPL runs. If you want something optimized for music, you can opt for a daily coil and get smooth response over a wide range.
Materials & Build Quality
The HC Series uses a fourspoke cast aluminum basket, a 3″ copper voice coil, and heavy spiders for great excursion and return. After several months of daily driving and competition, I didn’t notice cone fatigue or loss of output. Everything feels tight and premium.
RealWorld Performance & Power
The RMS rating runs from 1500W and up, depending on coil and custom build. I’ve personally competed with this sub in a twosub ported setup at Midwest SPL competitions and regularly hit in that 145-148 dB range on music. The bass is deep, but what I really like is that it keeps its composure with quick response, so snappy basslines in rock or doublebass drumming don’t blur together. You can even push it hard with steady music sessions and it responds without hesitation or notable rise in temperature.
Installation Notes
You’ll get the best out of the HC Series by contacting Fi directly to talk over your car and amp so you get a sub built for your usage; it really helps if you’re new or have specific goals. Box recommendations vary, but for daily loud, I’ve found 2-2.6 cubic feet at 32-35Hz hits the spot. The team at Fi is always really patient and helpful, and happy to talk tech details.
Pros & Cons
- Customizable to your music style and amp power
- Prograde materials, made to order
- Excellent balance between SPL and musicality
- Need to wait for custom build time (up to 3-4 weeks)
- Pricing rises with extra options
- You’ll want to tune carefully for genre or usage
Gately Alpha 12″ V2 Subwoofer Review

Gately Audio jumped on the car audio map with their solid SPL products, and the Alpha 12″ V2 doesn’t disappoint if you’re looking for topend performance with a little showcar flair. I ran this sub for a couple months in a custom ported enclosure and got some of the most consistent results in both music and SPL scores.
Build Quality and Features
With a 2200W RMS rating, triplestacked ferrite motors, a robust cast aluminum frame, and wide spider pack, the Alpha V2 is designed for hard play. The stitched highroll surround and glass fiber reinforced cone give it the durability needed for daily pounding and the occasional SPL burp. The cooling is on point; seriously, I never threw thermal errors once.
Sound Output & Musicality
This sub excels at keeping things musical while pushing big air. I was able to dial in clean, accurate bass with just a few hours of tuning. It performed great across a range of genres, from club tracks to rock, which shows its versatility. During a group test, it held its own up against more established brands and even took first place in a local soundoff for accuracy. Volume is no slouch either; 143.9 dB peak on music, not even full tilt.
Enclosure Versatility
The Alpha 12″ V2 is happy in both sealed and ported enclosures, which gives you some flexibility. For sheer output, I recommend a vented box, but you’ll still get clean, tight response in a wellbuilt sealed setup. Ported at 2.3 cubic feet tuned to 35Hz hit all the right SPL notes for me. Its forgiving design allows for minor tweaking in box size too.
Installation & Support
Gately Audio’s support team is super knowledgeable. I’ve emailed them a few times about enclosure questions and always got quick, detailed responses. Their install documentation is easy to follow; helpful if you’re building your own box.
Pros & Cons
- Handles big amps without drama
- Really solid construction and parts
- Performs well in a range of boxes
- Midtohigh price range for a single sub
- Weight adds up if you’re doing multiple subs
Orion HCCA122 Review
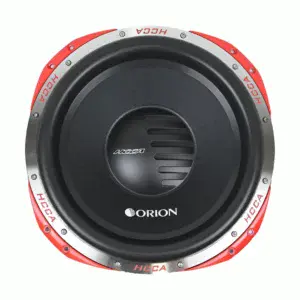
Orion’s HCCA line is legendary in car audio, especially if you’ve ever watched a soundoff from the ’90s or early 2000s. The newest HCCA122 stays true to tradition, blending reliable overbuilt hardware with a modern edge for competitions and demo builds.
Build & Technology
The HCCA122 features a large dualstacked ferrite magnet, a progressive Nomex spider, and a beefy polypropylene cone with stitched edge. The cooling system is serious: big vents and a smartly designed basket that doesn’t trap heat. I’ve seen them survive burps of up to 4000W without blowing coils (though the official RMS is rated at 2000W, which is where you should aim for longevity).
Sound & Output
This sub is a monster in terms of output and loves every bit of power you can throw at it. I tested with an Orion XTR2500.1D and, even at half gain, windows and panels in my test vehicle vibrated pretty aggressively. While it can get somewhat peaky in small ported boxes, if you tune your enclosure in the high 20s or low 30s Hz range, the lowend rumble is both heavy and satisfying. I hit 144 dB on music and a bit higher on test tones during comps.
Tuning & Drawbacks
The HCCA122 is best for vented or ported enclosures, ideally between 2 to 2.5 cubic feet, tuned anywhere from 28Hz to 35Hz depending on your goals. It’s not the most musical at quiet volumes, so it’s a better pick if you want to get loud and stay loud. The weight is a factor, and so’s the mounting depth, so check trunk clearances before you start your build.
Pros & Cons
- Legendary SPL potential, hits hard and deep
- Handles huge power without blowing easily
- That Orion “red basket” always gets compliments
- Tends to be peaky on certain frequencies, careful box tuning helps
- Not the first pick for SQ (sound quality) purists
How to Pick the Best Competition 12″ Subwoofer for Your Needs
Picking the right sub goes beyond just looking at RMS numbers. It’s all about what kind of sound you want, your music preferences, how much space you’ve got, and what your electrical system can handle. Here’s what I tell folks new to competing or building big bass systems.
1. Think About Your Power Setup
Competitiongrade subs eat power. You’ll want a dedicated mono amp that can deliver at least the RMS rating of your sub, plus a quality wiring kit and either a secondary battery or a beefedup alternator if you run multiple subs. Running a 100A alternator on a 2000W sub will cause issues; keep your electrical strong.
2. Enclosure Makes a Huge Difference
The box is easily as important as the sub itself. Ported boxes offer more output and low tuning (great for SPL and deep bass), while sealed enclosures offer accuracy and smaller size. Most of these subs come alive in larger ported enclosures tuned to 32-35Hz, but check each brand’s recommendations, since too big or too small can wreck your sound.
3. Know Your Vehicle’s Limits
Some vehicles just aren’t built for giant sub setups. Measure depth, width, and trunk passthrough spaces before buying. Heavier magnet structures can need thicker mounting baffles, and a fourdoor sedan sometimes just can’t fit a superdeep sub without major mods.
4. Daily Driving vs. AllOut SPL
Decide if you want to flex at competitions or have enjoyable daily bass. Some subs (like the Fi HC) strike a good balance, while others (like Orion HCCA122 or the Slapz Smackdown) can lean more toward SPL and big output over daily music listening. There’s no wrong answer; just know which style you want most of the time and set your build up to match your everyday needs.
5. Budget and Brand Support
Competition subs aren’t budget picks, but you get what you pay for. Find companies with solid warranty policies and good customer service. If you need to special order, check expected build and shipping times. I’ve found Fi and Gately to be easy for custom requests, while brands like DC and Orion are usually in stock at most big dealers. Support can make or break your install experience, too.
Competition Subwoofer Community & Support
The subwoofer scene has a big online community: Facebook groups, Reddit threads, and brandspecific forums. If you hit a snag during install or want box design tips or amp matching help, you’ll always find knowledgeable folks willing to help out. I recommend sharing your build plan on a forum like CarAudio.com or hitting up YouTube for wiring or boxbuilding tutorials. There’s a lot to gain from connecting with fellow enthusiasts when you’re troubleshooting weird issues or need fresh ideas.
- Benefit: Get realworld advice on tuning, enclosure design, and amp selection.
- Benefit: Share your progress, get feedback, and avoid costly mistakes.
- Benefit: Learn tricks of the trade, like how to reduce voltage drop or eliminate trunk rattle.
Tips for Maintaining & Getting the Most From Competition Subs
Big subwoofers need a little TLC if you want them to last through pounding sessions. Here are a few tips I’ve picked up the hard way:
- Break in your sub for at least 8-10 hours at moderate volume before cranking it up. Let that suspension loosen up for best results.
- Check wiring connections and retighten your sub and box mountings every couple months. These low frequencies love to vibrate everything loose.
- Avoid running distortion. It kills coils. If you hear clipping, ease off the gain and check your amp tuning.
- Invest in a decent sound deadening kit for your car’s trunk and doors. You’ll get cleaner bass and less rattle, especially in competition scoring lanes or daily loud sessions.
Pricing & Value Breakdown
Here’s how the five subs stack up for value versus price (pricings are current as of 2026):
- Z-Series ZV7 12″: $649–$699. Mid-high range, but justifies the tag with power, build, and reputation.
- Slapz Audio Smackdown V2 12″: $589. Competitive for the SPL world, solid warranty.
- Fi Audio HC Series 12″: $579–$709. Pricing varies based on custom order options, but you get exactly what you want.
- Gately Alpha 12″ V2: $699. Premium price but also premium performance and customer service.
- Orion HCCA122: $569–$599. Steeped in SPL legacy, always a safe bet for brutal output.
If you’re just getting started, even the entrylevel pricing here is a leap above standard subwoofers, but the longterm reliability and output make a worthwhile difference if you’re serious about bass.
The Bottom Line: Which Subwoofer Is Right for You?
No matter what you pick from this list, you’re getting a highoutput subwoofer that’s built to take whatever you can throw at it; it’s smart to match your choice to your goals and setup for best results.
- For Straight SPL or Competition: Slapz Smackdown V2 or Orion HCCA122 absolutely pound for SPL numbers and handle big power all day.
- For Music and a Mix of SPL: Fi Audio HC Series or Gately Alpha V2 blend musicality with output and let you fine tune to your needs.
- For Versatility and Daily Driving: Z-Series ZV7 is a beast in just about any setup and won’t disappoint even when you’re not competing.
If you’re passionate about car audio or want some advice before you build your next system, I’m happy to share more of my own box designs, amp picks, or tuning settings. Drop questions below or reach out in one of the big car audio groups. I always love seeing other people’s setups and helping them hit new lows (literally). Happy building, and enjoy the bass!
PS. Have questions about wiring, box tuning, or planning a multisub setup for the lane? I’m always around to help troubleshoot or brainstorm, so comment below or find me on the big car audio forums and let’s talk bass!
